Chlorpyrifos Product Information Update
This memorandum regarding the use of chlorpyrifos on food products in 2024 has been provided by Clayton Myers of …


El inglés es el idioma de control de esta página. En la medida en que haya algún conflicto entre la traducción al inglés y la traducción, el inglés prevalece.
Al hacer clic en el enlace de traducción se activa un servicio de traducción gratuito para convertir la página al español. Al igual que con cualquier traducción por Internet, la conversión no es sensible al contexto y puede que no traduzca el texto en su significado original. NC State Extension no garantiza la exactitud del texto traducido. Por favor, tenga en cuenta que algunas aplicaciones y/o servicios pueden no funcionar como se espera cuando se traducen.
Inglês é o idioma de controle desta página. Na medida que haja algum conflito entre o texto original em Inglês e a tradução, o Inglês prevalece.
Ao clicar no link de tradução, um serviço gratuito de tradução será ativado para converter a página para o Português. Como em qualquer tradução pela internet, a conversão não é sensivel ao contexto e pode não ocorrer a tradução para o significado orginal. O serviço de Extensão da Carolina do Norte (NC State Extension) não garante a exatidão do texto traduzido. Por favor, observe que algumas funções ou serviços podem não funcionar como esperado após a tradução.
English is the controlling language of this page. To the extent there is any conflict between the English text and the translation, English controls.
Clicking on the translation link activates a free translation service to convert the page to Spanish. As with any Internet translation, the conversion is not context-sensitive and may not translate the text to its original meaning. NC State Extension does not guarantee the accuracy of the translated text. Please note that some applications and/or services may not function as expected when translated.
Collapse ▲This memorandum regarding the use of chlorpyrifos on food products in 2024 has been provided by Clayton Myers of …

Botrytis blight (caused by Botrytis cinerea) is a well-known problem among greenhouse ornamental crop producers. This ubiquitous fungus has …
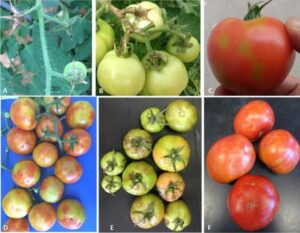
A recent study from the University of Florida discovered high incidences of two tomato viruses (ToBRFV and PepMV) in …
The fungicide spray guides for tomato and pepper are intended for commercial growers and are suggested products or programs …
Commercial vegetable producers have a new tool to assist with integrated pest management (IPM) of diseases and insects in …
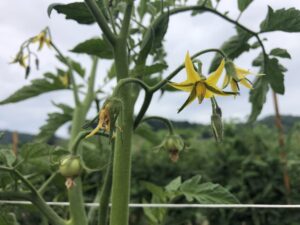
With planters rolling soon, we urge growers to think about thrips management now. The best source of information for …

Our collaborators at the University of Georgia have compiled a survey to assess the economic impact of ambrosia beetles …

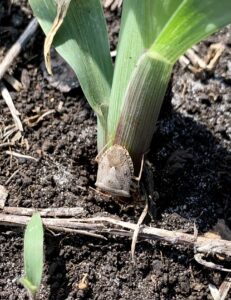
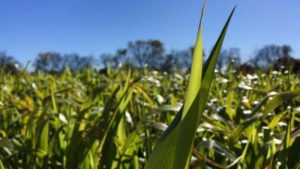
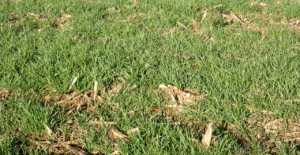
by D. Reisig, A. Post, and Ryan Heiniger Hessian fly is a serious pest of North Carolina wheat. A description …

This is the largest commercial vegetable grower event in the region with a high quality educational program put together …
Thanks to the generous support of the Corn Growers Association of North Carolina, and the USDA CCPM program, we have …
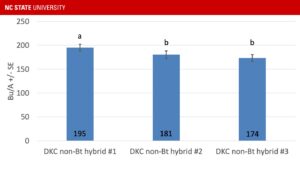
I’ve written previously about why North Carolina corn growers should feel comfortable planting non-Bt refuge corn, but the performance of non-Bt …

The NC State Plant Disease and Insect Clinic will be closed Thursday and Friday, November 23-24, 2023 for the …
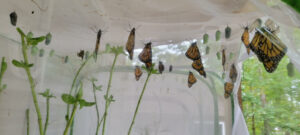
Have you ever wanted to raise Monarch butterflies? How about 237 monarchs released from your very own fingertips? Well, …
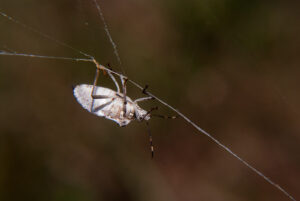
The tree fruit entomology group in the eastern US is beginning collaborative work to develop new and updated strategies …
The 75th Annual Crop Protection School will be held virtually (via Zoom) Thursday, November 30, 2023. Registration is free …
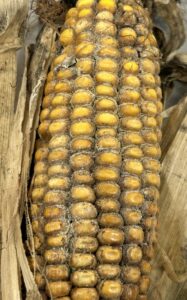
Incidences of ear rots were particularly high this year, especially in the Blacklands area. Ear rots were caused by …
Early this week, I got together with Drs. Tom Barber (University of Arkansas) and Jason Bond (Mississippi State University) …
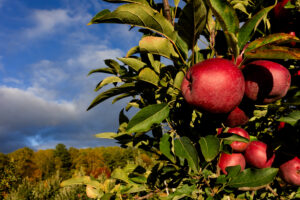
With apple harvest fully underway, this will be the last insect update of 2023. During the past 7 to 8 …
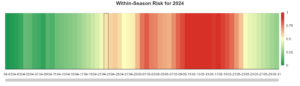
Emergence of first generation adults of the brown marmorated stink bug ranges from about 15% (Henderson County) to 67% …
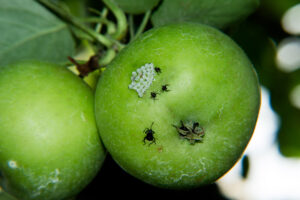
Based on the degree-day model, emergence of the brown marmorated stink bug is underway in most areas, with DD …